What is an Ethernet network port Used for?
The ethernet network port, often called an RJ45 port, is crucial in modern tech environments. It is the primary interface for wired internet and network connections, providing a stable and high-speed link for various devices.
Unlike wireless connections, which can be unstable and prone to interference, an ethernet network offers consistent performance.
It is ideal for activities that demand high bandwidth, such as online gaming, video conferencing, and HD streaming.
Many tech enthusiasts prefer using an ethernet network for its reliability and lower latency, which enhances the overall user experience. An ethernet network port is commonly found in various devices like computers, routers, switches, and modern smart TVs.
Connecting these devices through an ethernet network ensures they’re integrated into a centralized network system, essential for efficient data transfer and seamless communication.
For businesses, using an ethernet network means enhanced security, as it reduces the risks associated with wireless hacking.
Additionally, ethernet network ports are essential for connecting to network peripherals, including printers and network-attached storage (NAS) devices.
This setup facilitates resource sharing and remote access, further streamlining operations. Ethernet network ports can create a robust smart home ecosystem in a home setting, directly linking various IoT devices like security cameras and smart thermostats to your network wiring for uninterrupted performance.
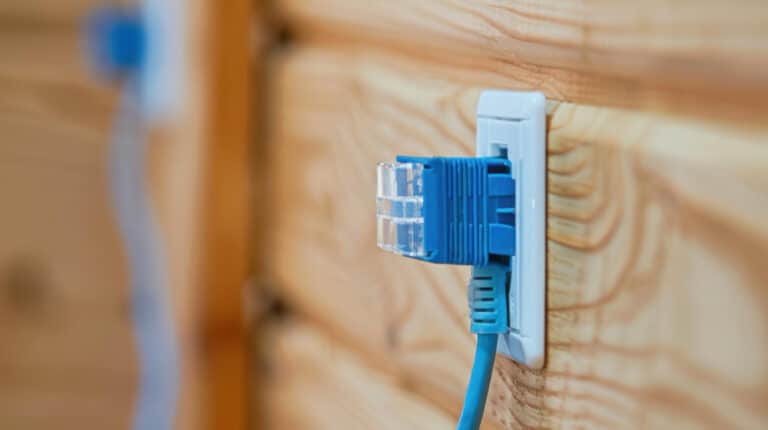
You’ll often need to install ethernet wall plates when setting up an ethernet network. These wall plates house the ethernet jacks, allowing neat and organized cabling. Such an organized setup improves the aesthetics and minimizes the risk of cable damage.
Running ethernet cables through walls and connecting them to ethernet sockets and jacks typically provides a cleaner and more reliable network solution than wireless options.
Ultimately, the ethernet network port is indispensable for anyone seeking a reliable, fast, and secure connection for internet and network activities. Whether used for professional or personal purposes, the benefits of an ethernet network cannot be overstated.
Types of Ethernet Wall Plates
When setting up your home or office network, understanding the types of ethernet wall plate options available is crucial. Ethernet wall plates interface between your network cables and your devices. They come in various types to suit different needs, from single-port plates to more complex multi-port configurations.
A single-port ethernet wall plate is ideal for simple setups with only one connected device. On the other hand, multi-port ethernet wall plates can accommodate multiple jacks and plugs, making them perfect for environments requiring extensive connectivity.
Ethernet wall plates are typically available in different colors. Still, white is the most common choice, blending seamlessly with most walls. Regardless of color, ensuring that the ethernet wall plate matches your interior decor can help maintain an aesthetically pleasing setup.
Each ethernet wall plate is designed to house one or more ethernet jacks, the connectors where you plug in your network cables. They ensure secure and efficient data transmission, minimizing the risk of connection issues.
Some plates come with female connectors, requiring a patch cable to connect to your device. In contrast, others may include integrated jacks, facilitating a more straightforward install process.
Moreover, modern ethernet wall plates often have additional features like shielding to reduce electrical interference or built-in signal boosters to enhance network performance.
These added functionalities can be beneficial if you’re dealing with long cable runs or in an area prone to electrical noise.
When planning your network installation, it’s essential to consider the placement of the wall plates. Install the plates near your primary devices, such as computers, printers, and network switches, to minimize cable lengths and maintain neatness.
Ensuring the proper alignment and secure mounting of the plates on the wall is essential for efficient cable management and protection.
Choosing the right ethernet wall plate type can simplify your network setup and provide a reliable electrical connection for all your devices. By understanding the various options, you can make an informed decision that best meets your networking needs.
How to Run Ethernet Cable Through Wall?
Running ethernet cable through walls is essential for a clean and efficient network setup. First, you must plan your installation route to ensure minimal disruption and maximum efficiency. Begin by choosing the location where the ethernet wall plate will be installed.
Mark the spot and use a stud finder to avoid drilling into any studs or electrical wiring. Once the location is marked, create an opening by cutting a hole in the drywall using a drywall saw.
Ensure the hole is large enough for the ethernet cable but small enough to mount the wall plate securely. Next, perform the same steps for all intended ethernet cable endpoints within your home or office to complete the wiring layout.
You’ll need fish tape or a cable puller to run the ethernet cable through your walls. Insert the fish tape into the hole and guide it through the wall, aiming for the destination hole. Once the tape reaches the other side, secure the ethernet cable to the tape and gently pull it back through the wall.
This step requires patience to prevent the cable from tangling or getting damaged. If needed, seek assistance for complicated runs that involve multiple turns or extended distances.
After the ethernet cable is successfully threaded through the wall, proceed to terminate the cable ends.
Strip a small portion of the outer jacket to expose the internal wires. Use an ethernet crimping tool to attach an RJ45 connector, ensuring the wiring order follows the T568A or T568B standard. Repeat this process for all endpoints.
Finally, mount the ethernet wall plate and attach the ends of the cable to their respective jacks. Double-check the connections to confirm proper signal flow and functionality.
Running ethernet cable through walls may appear daunting. Still, careful planning and execution ensure a seamless and professional network setup by Switchback Systems.
How to Install and Wire Ethernet Socket and Jack
Connecting the network wire to the patch panel
When connecting your network wire to the patch panel, following the proper steps is essential to ensure a reliable and efficient network setup.
First, gather all the necessary tools and materials, including the Ethernet cables, patch panels, connectors, and electrical tools. Start by carefully stripping the network wire to expose the internal cables.
You’ll need to connect each wire to the corresponding port on the patch panel. Properly arrange the wires based on the color-coded standards, typically T568A or T568B, depending on your network’s requirements.
Once the wires are placed correctly, use a punch-down tool to attach each wire to the patch panel connectors securely. This tool helps ensure the wires are firmly connected and the electrical connection stable.
Double-check that each wire is seated correctly and that there are no loose connections. Ensuring a secure connection at this stage prevents future network issues. Once all the wires are in place, you can use cable ties to organize the cables neatly and avoid any tangling or disconnections.
After the wiring procedure, it’s time to connect the patch panel to the network switch using Ethernet patch cords.
Plug one end of the patch cord into the corresponding port on the patch panel and the other end into the network switch.
This connection facilitates network traffic flow from the wall sockets to the network equipment. Lastly, the connections are tested using a network tester to verify that each Ethernet wall socket works correctly and provides Internet connectivity.
If you encounter any issues, revisit your wiring to ensure no damage or disconnected wires. By carefully following these steps, connecting your network wire to the patch panel becomes straightforward, providing a stable and efficient internet setup.
For more professional guidance and quality tech materials, don’t hesitate to consult with Switchback Systems for your network wiring needs.
